
红山社区比赛仿真环境

红山社区比赛仿真环境
MGodmonkey1.资料
- 比赛官方链接:https://www.osredm.com/competition/JQTJ
- 比赛答疑仓库:https://www.osredm.com/JQZN/jqzn-issue
- 仿真接口文档:https://jqsdk.osredm.com
- 问题答疑第一期:https://www.osredm.com/JQZN/jqzn-issue/tree/master/issue-20230826.md
- 问题答疑第二期:https://p.kdocs.cn/s/WCSDECY3ADQDG
- 问题答疑第三期:https://p.kdocs.cn/s/GVZZWGY3ADQDG
2.仿真环境搭建
说明:因为Windows环境下仿真比较简单,并且Windows环境下能用到显卡资源,仿真可以更加流畅,可以先搭Windows环境仿真,后续代码传给我统一在linux下打包即可
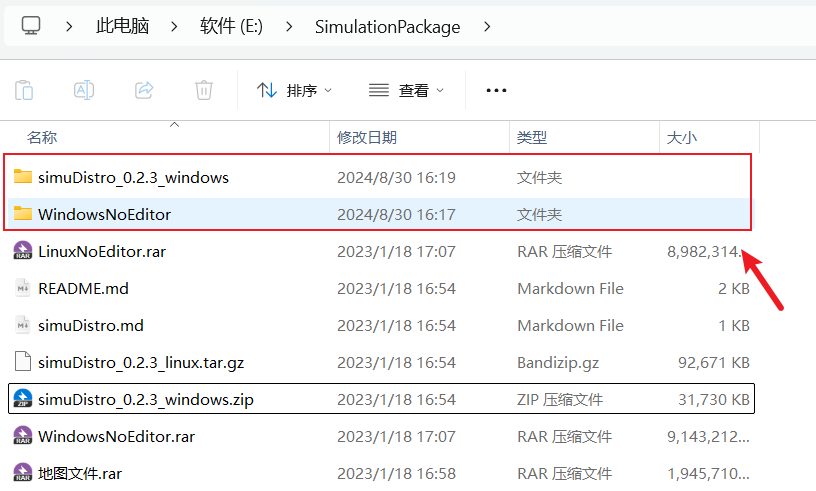
解压
仿真开发包.zip并将文件夹里面的仿真开发包文件夹改名成 英文名,如SimulationPackage,移动到根目录,如E:\SimulationPackage,确保后续环境不会因为路径名出错解压
WindowsNoEditor.rar,simuDistro_0.2.3_windows.zip压缩包****
安装SDK环境
安装Anaconda :用U盘中的安装包或者官网 https://www.anaconda.com/download/success自行下载
创建python3.6虚拟环境
打开cmd终端:win+r输入cmd 或者 win+q搜索Anaconda Prompt(cmd打开如果前面没有(base),通过输入
conda activate base激活)通过下面的指令插件一个python3.6环境
1
2
3
4
# sim是虚拟环境的名字,安装过程遇到选项输入y然后回车即可
conda create -n sim python=3.6
# 激活sim虚拟环境
conda activate sim通过下面的指令安装 SDK环境(不要翻墙,可能会报网络错误)
1
pip install https://jqtj.obs.cn-north-4.myhuaweicloud.com/sdk/windows/swarmae-1.0.1-py3-none-any.whl -i https://pypi.tuna.tsinghua.edu.cn/simple/
验证安装,终端输入
python,接着输入from swarmae.SwarmAEClient import SwarmAEClient,没报错就是已经安装成功(输入quit()回车退出python环境)1
2
3
4
5(sim) C:\Users\17814>python
Python 3.6.13 |Anaconda, Inc.| (default, Mar 16 2021, 11:37:27) [MSC v.1916 64 bit (AMD64)] on win32
Type "help", "copyright", "credits" or "license" for more information.
>>> from swarmae.SwarmAEClient import SwarmAEClient
>>>

注:Anaconda安装即创建环境有问题的参考博客【超详细版Anaconda的安装及使用conda创建、运行虚拟环境以及使用镜像源】
UE4仿真包配置
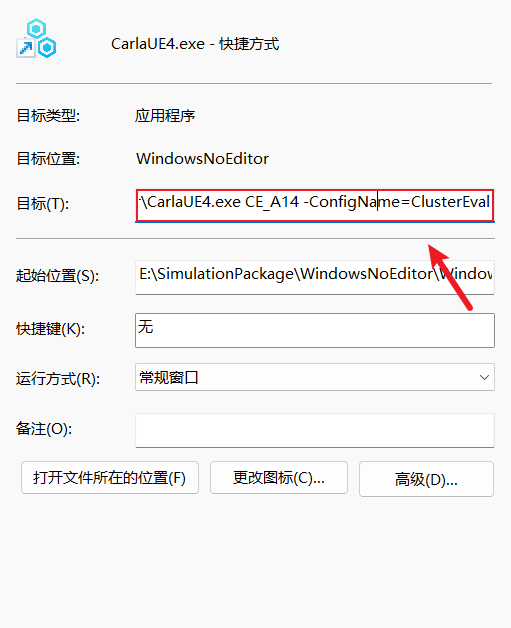
打开
E:\SimulationPackage\WindowsNoEditor\WindowsNoEditor,右键CarlaUE4.exe->显示更多选项->创建快捷方式修改配置文件:
E:\SimulationPackage\WindowsNoEditor\WindowsNoEditor\CarlaUE4\Config\ClusterEval.ini(配置文件格式说明见第三章)1
2
3
4
5
6
7
8
9
10
11[Game]
GameId="77777" #随便取
SubjectId=5 #对应科目几,体现在仿真启动后的标题“旋翼无人机自主避障科目”
Seconds=600 #好像没用
AirSimComPort=4443
AirSimCmdPort=4446
[Team]
TeamId="Team1"
IMVNum=5
QRTNum=10接着右键快捷方式,在目标后面加
CE_L1 -ConfigName=ClusterEval(别忘了exe后面有空格),然后点击确定
说明:CE_L1代表科目一的地图,CE_L2代表科目三的地图,如果是无人机的地图,则需要将其修改为CE_L4~CE_7,更详细的说明见第三章
双击快捷方式进入仿真环境,终端输入
netstat -ano | findstr 2000,如果出现2000的端口则说明启动正常
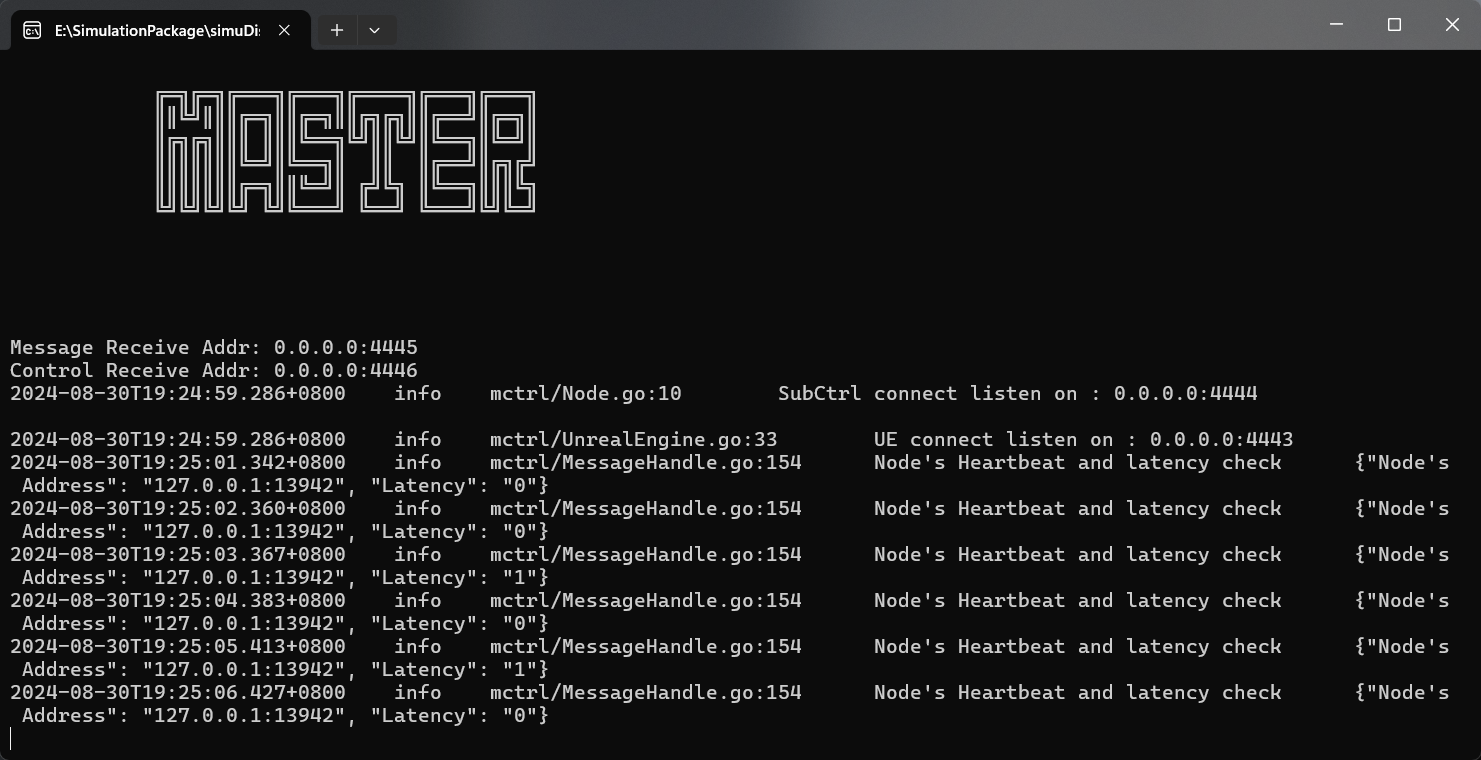
启动仿真动力程序
打开
E:\SimulationPackage\simuDistro_0.2.3_windows文件夹,双击start.bat即可类型选择
2. 四旋翼然后回车出现下面的心跳包界面说明启动成功


3. 配置文件说明
3.1配置文件说明
| Game | GameId | string | 指定本场比赛ID |
|---|---|---|---|
| SubjectId | int | 指定本场科目编号 | |
| Seconds | int | 指定本场比赛时长 | |
| AirSimIp | ip | 指定固定翼仿真ip地址 | |
| AirSimComPort | port | 指定仿真引擎连接TCP端口号 | |
| AirSimCmdPort | port | 指定仿真信息接收UDP端口号 | |
| Team1 | TeamId | string | 指定队伍1ID |
| IMVNum | int | 指定步兵机动战车数量 | |
| CMSNum | int | 指定巡飞弹(自杀式无人机)数量 | |
| SVLNum | int | 指定察打无人机数量 | |
| QRTNum | int | 指定小型四旋翼无人机数量 | |
| QRBNum | int | 指定四旋翼自杀式无人机数量 | |
| Team2 | - | - | 队伍2配置域,配置方法同队伍1 |
示例:
1 | [Game] |
说明:载具的生成与地图有关,并不是说配置文件里面说了生成啥就是啥,经过测试,地图CE_L1~CE_L3只能生成IMVNum,即小车,对应小车的科目1到3,CE_L4~CE_L6只能生成QRTNum,即四旋翼无人机,CE_L7能生成小车和四旋翼无人机,CE_A地图系列目前不知道是干啥用的
3.2地图说明
| 项目 | 科目 | 对应地图 |
|---|---|---|
| 空地 | 1 | CE_L1 |
| 2 | CE_L2 | |
| 3 | CE_L3 | |
| 4 | CE_L4 | |
| 5 | CE_L5 | |
| 6 | CE_L6 | |
| 7 | CE_L7 | |
| 空中 | 1、4 | CE_A14 |
| 2 | CE_A2 | |
| 3、6 | CE_A36 | |
| 5 | CE_A5 | |
| 7 | CE_A7 |
说明:空中系列的地图暂时不用管
3.3科目说明

4.完整运行流程
- 双击
E:\SimulationPackage\WindowsNoEditor\WindowsNoEditor\CarlaUE4.exe - 快捷方式打开地图 - 双击
E:\SimulationPackage\simuDistro_0.2.3_windows\start.bat打开动力系统 - 用VSCode打开demo文件夹,并且点击上面的终端->新建终端->输入
conda activate sim
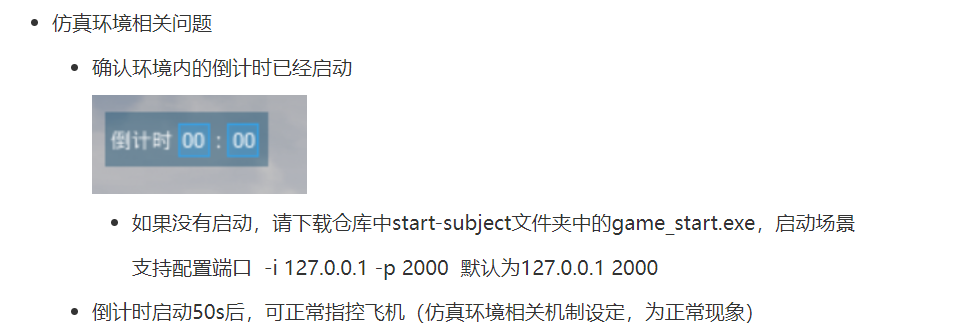
双击
game-start.exe, 启动仿真内倒计时,等倒计启动了50s后才能对无人机进行控制(game-start.exe下载地址:https://www.osredm.com/JQZN/jqzn-issue/tree/master)在终端输入
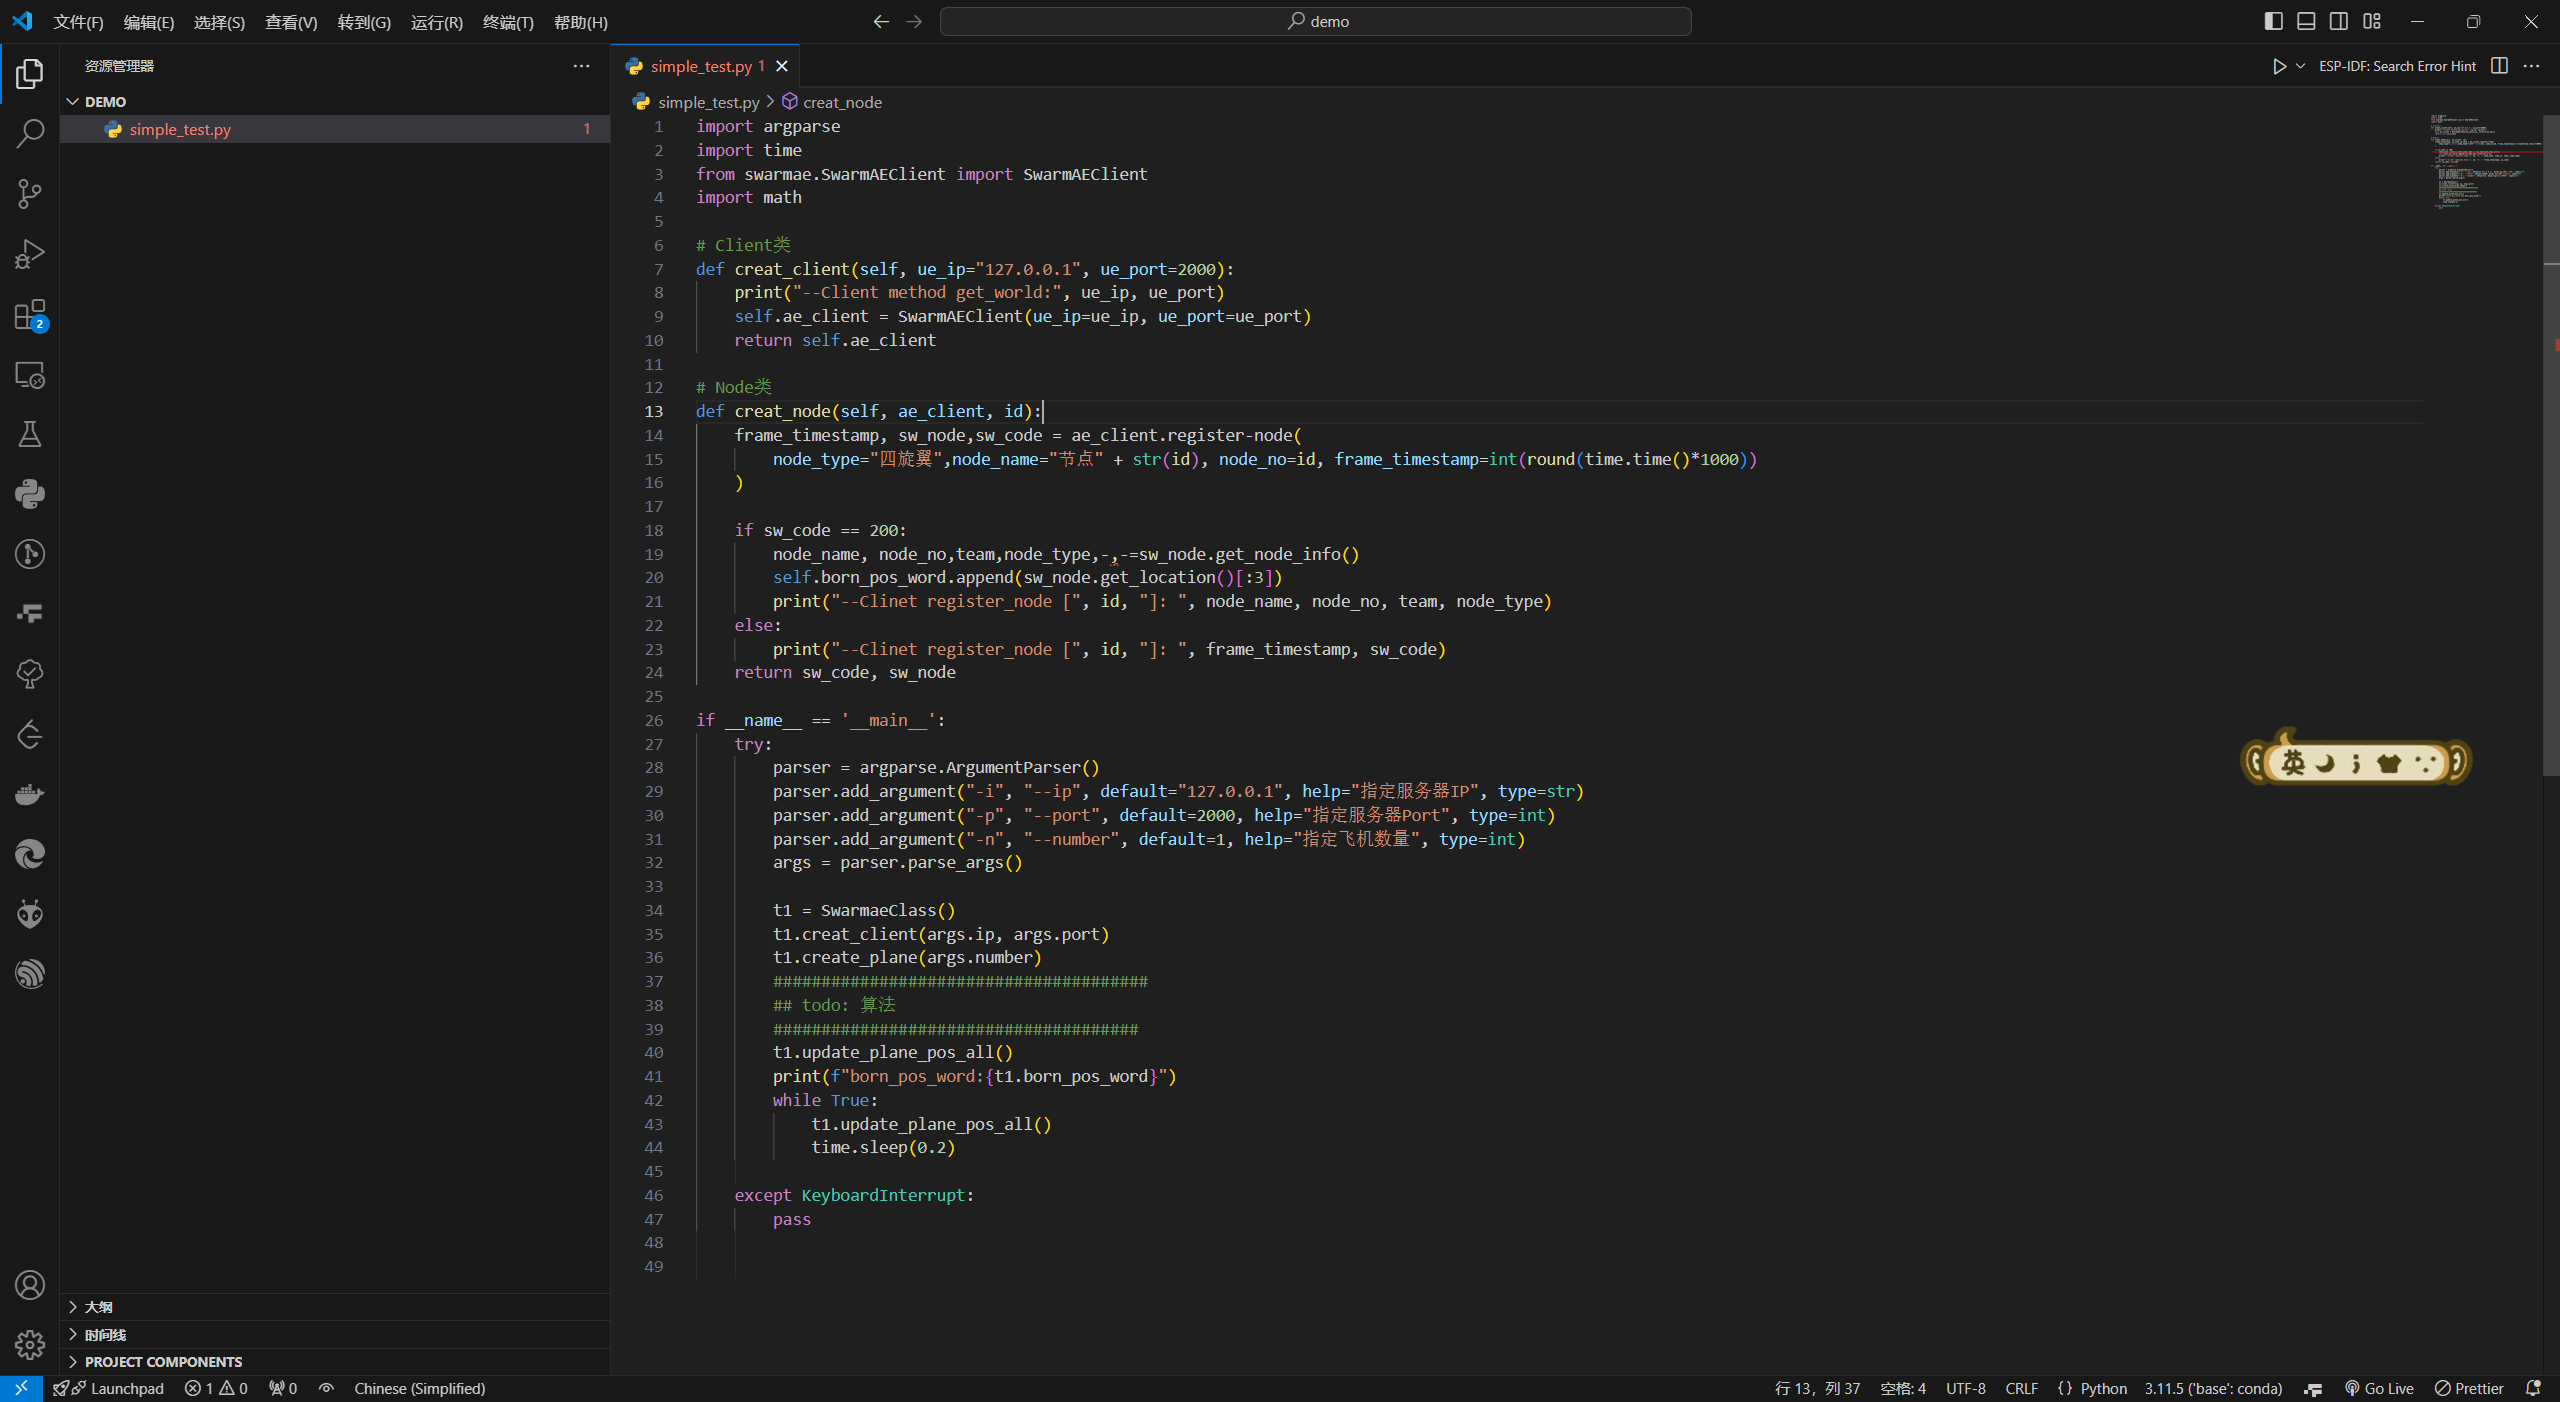
python simple_test.py,后台显示如下,无人机向前飞行,说明仿真成功
1 | (sim) E:\SimulationPackage\demo>python simple_test.py |
5.示例代码
5.1多无人机控制案例
配置文件:
2
3
4
5
6
7
8
9
10
11
12
13
GameId="77777" #随便取
SubjectId=4 #对应科目几,体现在仿真启动后的标题“旋翼无人机自主避障科目”
Seconds=600 #好像没用
AirSimComPort=4443
AirSimCmdPort=4446
[Team]
TeamId="Team1"
IMVNum=1
CMSNum=1
QRTNum=10
QRBNum=1启动:
python simple_test.py -n 10(加参数-n 10表示注册10辆无人机进行控制)
1 | import argparse |
注:说明在代码中,将无人机向前后左右飞行封装为一个函数,多线程控制多辆无人机,判断无人机是否到达指定目标点才给下一个目标点进行控制,根据上面的例程进行修改,修改内容为无人机的飞行航线,其余不需要修改
flight_plan_funcs列表表示无人机控制函数列表,flight_plan_1表示第1个无人机的具体飞行控制
5.2多小车控制案例
使用:
python simple_test_car.py
1 | import argparse |
5.3地图信息读取
使用:
python get_map_info.py -s 1(-s 1表示第一个科目的地图信息,需要先打开仿真地图才能获取信息)在具体代码中调用:
定义全局变量
map_info = {},方便在其他函数中调用复制对应科目的函数,如
def get_subject_one_info(world)在main函数中添加
map_info = get_subject_one_info(world)调用地图信息的方式:
map_info['BP_Bridge']['local'][0][0],表示科目一中第一条桥的x
map_info['BP_Bridge']['local'][0][1],表示科目一中第一条桥的y
map_info['BP_Bridge']['local'][0],表示科目一中第一条桥的x,y,z
map_info['BP_Bridge']['local'][1],表示科目一中第二条桥的x,y,z
map_info['SM_SpeedBump']['local'][0],表示科目一中第一条区域线的x,y,z如果是科目五中还有门框的旋转信息,则为
map_info['SM_DoorFrame']['rotation'],表示科目五中第一条外门框的pitch, yaw, roll
- 科目一
静态资源名 名称前缀 坐标信息示例(SDK方式) 坐标信息示例(fbx方式) 备注 桥 BP_Bridge第一段: (x=-515.309021, y=447.157715)x: -511.30445003032685, y: 447.1577346801758, z: 485.1984389305115整座桥由12部分组成 区域线 SM_SpeedBump第一条: x = -1072.7。第二条:x = -1062.7x: -1072.72, y: 439.79998779296875, z: 486.4460653877258一共五条
- 科目二
静态资源名 名称前缀 坐标信息示例(SDK方式) 坐标信息示例(fbx方式) 备注 火力掩护区域 SM_Wall_Singlex=1286.280029, y=423.690002, z=486.449982x: 1286.2800677490218, y: 423.69001159667823, z: 487.70000022888183获取到遮掩区域的两个顶点信息 路障 SM_Obstaclex=1761.797974, y=450.703613, z=487.442017x: 1761.797890625, y: 450.7036328125, z: 487.44203125路障有四个
- 科目四
静态资源名 名称前缀 坐标信息示例(SDK方式) 坐标信息示例(fbx方式) 备注 航路点信息 Waypoint第一个: x=504.899994, y=89.610001x: 504.89998046875, y: 89.6099609375, z: 490.92625一共两个航路点。
- 科目五
静态资源名 名称前缀 坐标信息示例(SDK方式) 坐标信息示例(fbx方式) 备注 外门框 SM_DoorFrame第一个: (x=780.000000, y=937.599976, z=490.551331)门的转向:Rotation(pitch=0.000000, yaw=0.000000, roll=0.000000)一共两个门。 fbx方式读取缺少一个门框信息,可直接查询内门框信息实现穿越。 内门框(需要穿越的门框) BP_DoorInst这两个的 X,Y相同,Z 不同,绝对值|Z1 - Z2|是门的高度 x: 780.0, y: 937.6, z: 502.2一共两个门。
1 | #!/usr/bin/env python |